
Back in the saddle…sorta
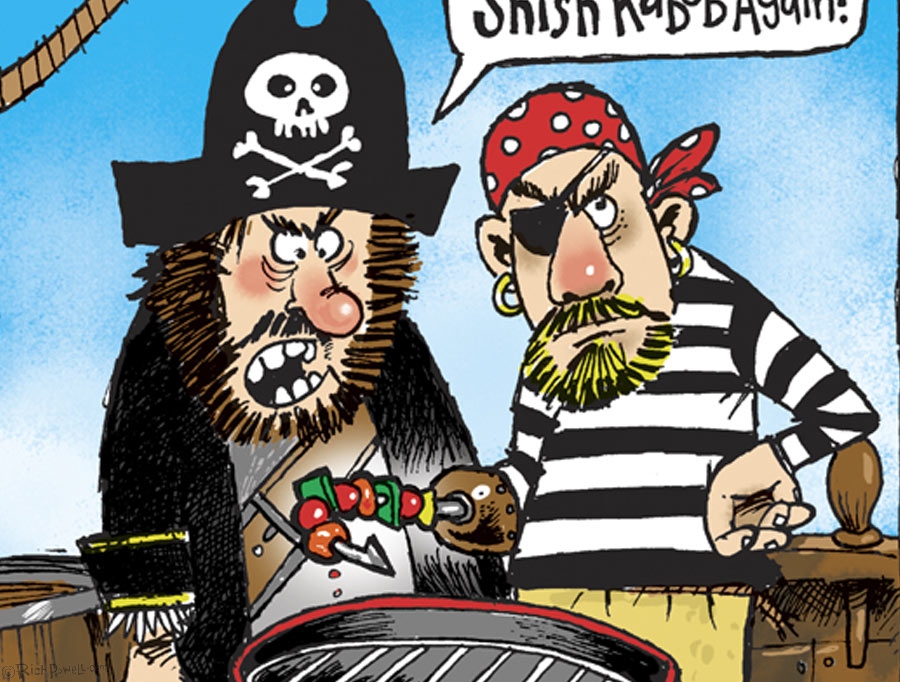
So, dealing with this herniated disk now for about 3 months has really screwed up my life. It can be completely debilitating and my desk has become something of a torture chamber BUT…Frankie got me a new chair and I’ve got some powerful drugs and here I am! I’ve been mostly drawing upstairs in a position that I’ve twisted into to keep away the weasels that gnaw on my back and I’ve gotten some good drawings accomplished. Let’s take a look at one, a new design for my “Fish On” series (t-shirts and prints). I’ve already finished three of these, all crazy fish, now I’m going to do three lures. Here’s the initial sketch, the raw scan followed by a shot after pumping up the contrast.


I try to draw the sketch as tight as I possibly can and completely avoid the inking by messing with it in Photoshop. I got forced into this technique by my art director at MAD and also by the folks at Crazy Shirts. What happened was this: I sent in my initial rough and after approval, I cleaned it up and inked it only to have the art director write back “What Happened???” They really liked the look of the up-contrasted pencil rather than the squeaky-clean inked version.
This actually has its advantages and disadvantages. I save time inking but I spend a lot of time tweaking the image in Photoshop to get just the right amount of “roughness” to the image. But…get this: often, the initial idea I send to Crazy Shirts is about 2 inches wide and just quickly sketched, REALLY rough. The funny thing is, often they’ll want it as is. Don’t change a line! Getting paid a grand for a 2 inch sketch is a little mind-blowing. I wish all my work was like that! Unfortunately that happens about twice a year.
When art directing myself, I like the work to stay rough but not really rough. I can achieve a sort of rough inked look by tweaking with the contrast and using the pen tool in Photoshop. 
This is the amount of zoom I usually use to clean the drawing up. I simply have my black and white chosen on the pen tool (in the upper right) and by pressing the spacebar to switch to the hand tool, I travel around the artwork using white to clean and black to add. I try to acheive just the right amount of sloppiness o make it fun to look at. I’ll even add what looks like dripped ink here and there.
Here’s a look at the art before and after :


After
Not too many changes. After I clean it up, it’s time to add color. I’ll write about that in the next post!

nice tutorial! and welcome back!
Thanks Nolan. I had no idea how hard it would be to try to form sentences on Oxycodone and Flexiril! Glad you liked it. I added another shot just now of the artwork in it’s raw scanned state.
Oh, sentences are overrated!
Håve you ever tried working with intuos’ wacom tablet and it’s wireless pen in photoshop? I did graphics and illustrations for quite a while for the News & Record. That is what I used when I wanted a painterly effect. It was also good for touching up or enhancing scaned drawings, color or B/W.